


Groups management
Overview
Silva’s Groups functionality comes from a separate product called Groups (surprise). Your Silva may not have Groups installed It is the role of the Manager to install the Groups product. It is the Chief Editors role to assign and manage groups.
It could happen that the Groups product is installed on the file system, but that it hasn’t been activated in Silva. In that case you see a warning message in the Access screen, with instructions about what steps to take. Navigate to the Access screen to check if there is a message about the Groups product.
About Groups
Silva offers the ability to group users together and assign a role to a whole group at once. This means whenever a group has a role in a location and a user is a member of that group, the user will also have this role. The group system can be used to manage small groups of Authors and Editors, but is particularly useful when managing the Viewer role, in which case groups could have a large amount of members.
Managing the role assignments of groups is done in much the same way as managing the role assignments of users. The only difference is that groups are not looked up in a separate screen; they are always available in the groups list in the right column of the access screen.
If Silva has been connected to LDAP, group membership information can be configured to be retrieved from the LDAP server. This allows the reuse of groups defined centrally on such a server, and can scale to many users and large groups.
Silva supports a number of different kinds of groups.
Normal Groups
Normal Groups are made out of users. These users are stored in Zope directly by Silva.
Virtual Groups
Virtual Groups are composed of other groups. Note that a user must be a member of all groups that are included in the Virtual Group, in order to gain the roles assigned to the Virtual Group.
IP Groups
IP Groups specify a range of IP addresses. IP Groups determine membership based on the IP address of the computer the user is using. This way, a user can be given a role only if the user has a particular IP address.
It’s thus possible to give all users accessing Silva from your local network, intranet or campus network a particular role. This is particularly useful when using the Viewer role to restrict access; an area of the site could be closed for all users except those on a certain network. Silva can function as an Intranet in this manner.
Using a Virtual Group you could even require that someone is in a particular network as well as being in another group in order to gain access.
Note that protecting access based on IP address is only a minimal security measure. The inherent weaknesses of the underlying IP protocol do not allow strong identification of users.
Using IP groups also may not work in all setups of Silva, as proxy servers could be in play.
External groups
In addition to the three built-in groups, it’s possible for group membership information to be retrieved from an external source like LDAP. In this case the group cannot be managed from Silva directly, but is available nonetheless to assign roles to.
1. Adding a Group
You must have Chief Editor or Manager status to add groups. To add a group in the access tab click on groups admin….
Note: If you do not see the “group roles” section in your Access Screen, your Silva Manager will need to add the Groups Product to your Silva installation.
Click on groups admin.... (Fig.1.)

Fig. 1. Adding a group
Fill in the id in “add a group” and select the type of group from the drop down list. (Fig. 2.)

Fig. 2. Add a group form
Click save, or save and edit if you wish to add people into the group who are already members of the site.
2. Groups - adding users to a normal group
To add users to the Group click on groups admin…. (Fig. 1.)
Type in the users name or part name and press search.
Select the name you want from the search results. (Fig. 3.)
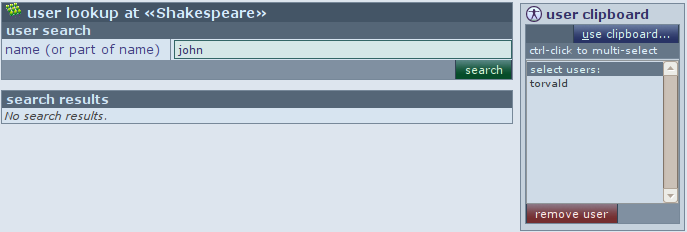
Fig. 3. Selecting users.
3. Groups Assigning Roles
Press the up arrows on the access button to get to the form to select a role for the group. Highlight the group and select the role from the select role list. (Fig. 4.)

Fig. 4. Exisiting groups
Editing Groups
Click the name of a group in order to add or remove users. This takes you to the Group workspace. Existing members are listed in the “group members” box, and can be removed with the remove users button (alt-r). New users can be added via the clipboard. If the clipboard is empty, click the lookup users button (alt-l) to go to the Lookup screen, where you can collect users on the clipboard.
It’s possible to combine members of existing groups into the one you’re editing.
Select from the “existing user groups” clipboard.
Click the copy users from group button. All users in the selected groups will be copied to the group being edited.
