


Code Source HowTo
Code Sources can provide practically any functionality possible in Zope, yet keep an Author safely in the Silva management area. By creating parameters for the Code Source, site managers can give Authors the possibility to create local variants, and since the parameters form shows up as a Kupu toolbox, all editing occurs in one screen (and is stored in one document). This helps retain that difficult balance between freedom to ‘create’ and too much leeway.
As an example we’ll make a Code Source to include an image outside of Silva into a document. A Silva Image only refers to images within Silva, and sometimes it’s necessary to refer to an image on the Internet or internal network. For instance OSI, the Open Source Initiative, makes a logo available that indicates that software has a certified open source license. They specifically request that you not put the image on your own site, but link to the logo on their site:
Creating a Code Source
The first step is to go to the location in the ZMI where you need the Code Source. This should probably be the Silva root – so it can be found from anywhere in the site – but could nested be in a branch.
Add a Silva Code Source.
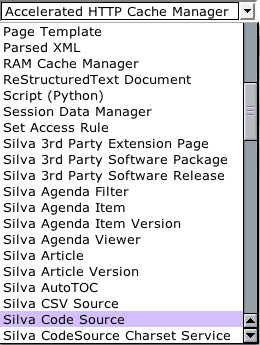
Fig. 1. Selecting a Code Source in the ZMI
Configuration
Fill in an id, title, and script id.
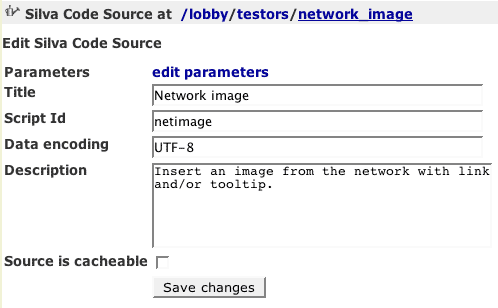
Fig. 2. Code Source configuration
For this example we named the Code Source ‘network_image’ and gave the script the id ‘netimage’. The data encoding is set as UTF-8 in case we want to add a caption, and a description of the Code Source is filled in. For now we won’t make the source cachable, but when finished it’s a good idea to do so, because there’s nothing dynamic in the Code Source and having it cached provides a big performance boost.
Creating parameters
The Author will need to fill in various parameters, and we’ll create a form to hold these values.
Click edit parameters.
Add and configure form fields.
Click the order tab and arrange the fields in a sensible order.
The form is a Formulator form. Using Formulator is fairly intuitive, but there is a HowTo available on zope.org if needed. Some of the fields should have their required checkbox turned off, and you may want to enter a css class to style the controls. In this example the finished field listing looks like this:
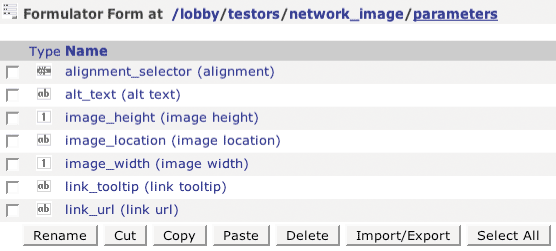
Fig. 3. A Code Source parameters form
Following are descriptions of the fields, listed in the order in which they appear in a rendered form.
- alignment: sets the standard Silva image alignments (default, align left, align center, align right, float left, float right).
- image location: this field is required.
- image width: an integer field. Formulator will complain in an alert if anything besides an integer is entered.
- image height: these dimension fields are required, as they considerably speed up page display in the browser.
- alt text: sets the alt text for the image. This field has a default value filled in – ‘image content’ – to coax the Author to fill in a text for the image alt attribute.
- link url: optional destination of the image’s link.
- link tooltip: if the image is linked, the text in this field will appear in a tooltip when a visitor rolls over the image with the cursor.
Note that the link url is a string field, and while it’s required, there is no validation. A validator could be written to ensure that an http link is properly formatted, scrub scripting, check that the target file has a specific extension, etc.
Code Source toolbox

Fig.4. The parameters form displayed in the Kupu editor
Creating the script or page template
Once the form is finished, click on the id of the Code Source in the breadcrumb trail, ‘network_image’. This brings you back to the configuration screen.
Click on the Contents tab.
Add a page template with the id ‘netimage’.
The code of the page template is:
<tal:block define="
  alignment  options/alignment_selector | nothing;
  centered   python:alignment == 'image-center' and alignment or nothing;
  location   options/image_location | nothing;
  linkurl    options/link_url | nothing;
">
<!-- network image -->
<div tal:omit-tag="not:centered"
  tal:attributes="class alignment">
<a tal:omit-tag="not:linkurl"
  tal:attributes="
    href linkurl;
    title options/link_tooltip | nothing;
">
<img tal:condition="location"
  tal:attributes="
    src location;
    class alignment;
    width options/image_width | nothing;
    height options/image_height | nothing;
    alt options/alt_text | nothing;
" />
</a>
</div>
</tal:block>
TAL analysis
The rendering code is nested in a tal:block element that defines some variables. These variables are used multiple times in the template, so it’s more efficient to define them once in the beginning. For instance the linkurl variable is used twice, once to check if there is a link url, and then to set it.
The ‘alignment’ variable sets the css class of the image.
The second define, ‘centered’, is there because we need to put a div around an image to make it center. The other alignments are all defined on the image itself.
The ‘location’ variable is used in a condition in the img tag to check if a location exists in the request (in options). The field is required, so we’re reasonably sure it will exist, but the condition assures a visitor won’t get an error page if it’s not there.
The div has a tal:omit-tag attribute that checks if the image should be centered. If its alignment is anything other than centered then the ‘variable == nothing’ and the div tag is omitted.
The same thing happens with the image link: if there isn’t an image link, the tag is omitted, otherwise there would be an empty href in the rendered html.
Rendering
The rendered html output of the Code Source exactly matches Silva html, so all layout and existing css styles should work the same as with a Silva Image. The page template elements are not indented to avoid excess spaces in the html.
Working
The OSI certified logo is a network image.
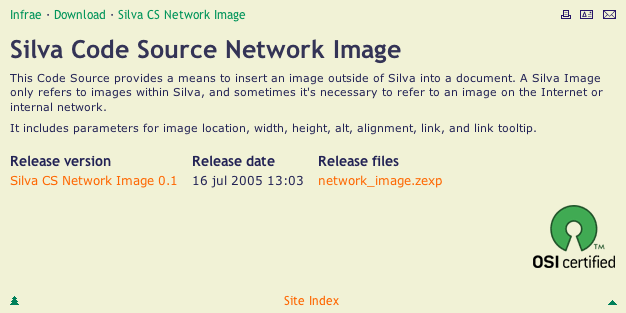
Fig. 5. The Code Source rendered in situ.
Download the Code Source
You can download a zexp of the Network Image CS.
Developer caveat
The parameters of a Code Source are stored as XML in a Silva document. When the document is later viewed, the stored value is retrieved from the XML, but all values are strings. If your Code Source has a Python script that expects an integer (because you created an integer field as we did in this example) but it gets a string, strange things can happen, including excessive recursion.
This problem must be solved in your code. You can use an integer field, but in your script you'll have to cast from string to integer before doing anything with the variable. The developer does have the assurance that the string (s)he gets back can be safely cast to an integer, since the validation ensures that.
